Sparkfun TMP102 qwiic to Nano R4 and UNO Q does not work with Library examples

Recenly connect TMP102 through qwiic to Nano R4 and UNO Q,the example provide by SparkFUN seem only for 5 pin, where included Alert pin which does not for QWIIC connector

I am woundering if there are new examples have been provided

I read some posts say that Nano R4 and UNO Q qwiic port is set to wire1.begin(), some say need to specify address e.g. sensor.begin(0x48,wire1)

Please clarify and proved sample code for test.

You can use this or wire a separate INT

Yep, default on those is Wire1…simply edit ‘Wire’ instances to Wire1 and declare it, as you mentioned there are many example threads on this forum with more details

Hi Russell,

I just found out that there is no Wire1 in the TMP102 library. I try to change #include<Wire.h> to #include<Wire1.h>, it says, no such thing.

You define it with “Wire1”…the other R4 threads have covered this process

Thanks Russell

I think something on Arduino Library, all document say use Wire1.h, not mothing work

Especiaaly when Wire1.h, error message retun no such file

there is NO Wire1.h, there is only Wire.h.

Wire1 is an instance of Wire that has the SDA and SCL pins correctly mapped for the Wire1 connection.

What you need to do change in your sketch:

Wire.begin(); to Wire1.begin();

if(!sensor0.begin()); to if(!sensor0.begin(0x48, Wire1));

Still not working

#include <Wire.h> // Used to establied serial communication on the I2C bus

#include <SparkFunTMP102.h> // Used to send and recieve specific information from our sensor

TMP102 sensor0;

void setup() {

Serial.begin(115200);

Wire1.begin(); //Join I2C Bus

}

void loop()

{

float temperature;

sensor0.begin(0x48, Wire1);

temperature = sensor0.readTempF();

Serial.println(temperature);

delay(5000); // Wait 1000ms

}

Do you use the board that was indicated before in the topic between Qwiic and the TMP-102?

I had a look at the schematics. It looks to be just the opposite of you need. The 5 pin ESLOV is assumed to PROVIDE 5V, which is then downgraded to 3v3 for the QWIIC. You don’t want that, you want to provide the 3v3 FROM the Qwiic to the TMP-102.

Just connect the QWIIC TMP-102 to QWIIC UNOR4 . YOu need to connect a different, loose wire for INT.

I am connect with UNO Q and Nano R4, try both, does not work, it looks like the Arduino library Wire.h does not function well.

I can do Seeedruino XIAO easily, the extension base board comes with 2 x I2C port, I just need to set sensor0.begin(0x48, Wire) to avoid conflict with OLED address.

Do you happen to have any other qwiic devices you can test with?

Can you share you whole code? For comparison, the code examples here have the needed changes SparkFun Arduino UNO R4 WiFi Qwiic Kit Hookup Guide - SparkFun Learn

One aspect that comes to mind that “could” be an issue is that the UNOR4 has pull resistors for SCL and SDA on the board. These are 5.1K. The TMP-102 also has pulled up resistors (4.7K). As these are in parallel the total value for the SDA and SCL is around 2.4K. That MIGHT be too low.

Since you can connect to Seeedruino XIAO, can you try with the SDA and SCL pins on the side of the UNO R4 (so that is Wire) and see that it works. These pins do NOT have pull-up resistors so you need to keep those on the TMP-102.

1 Like

Hi Russell,

there are two issues,

  1. Nano R4 can not be detected as comport, only show as DFU after double click on reset button. 2 out of 2 failed.

  2. UNO Q, detect comport successfully, but qwiic connect port does not trigger by code which is example code tmp102 basic, even change to wire1.begin()

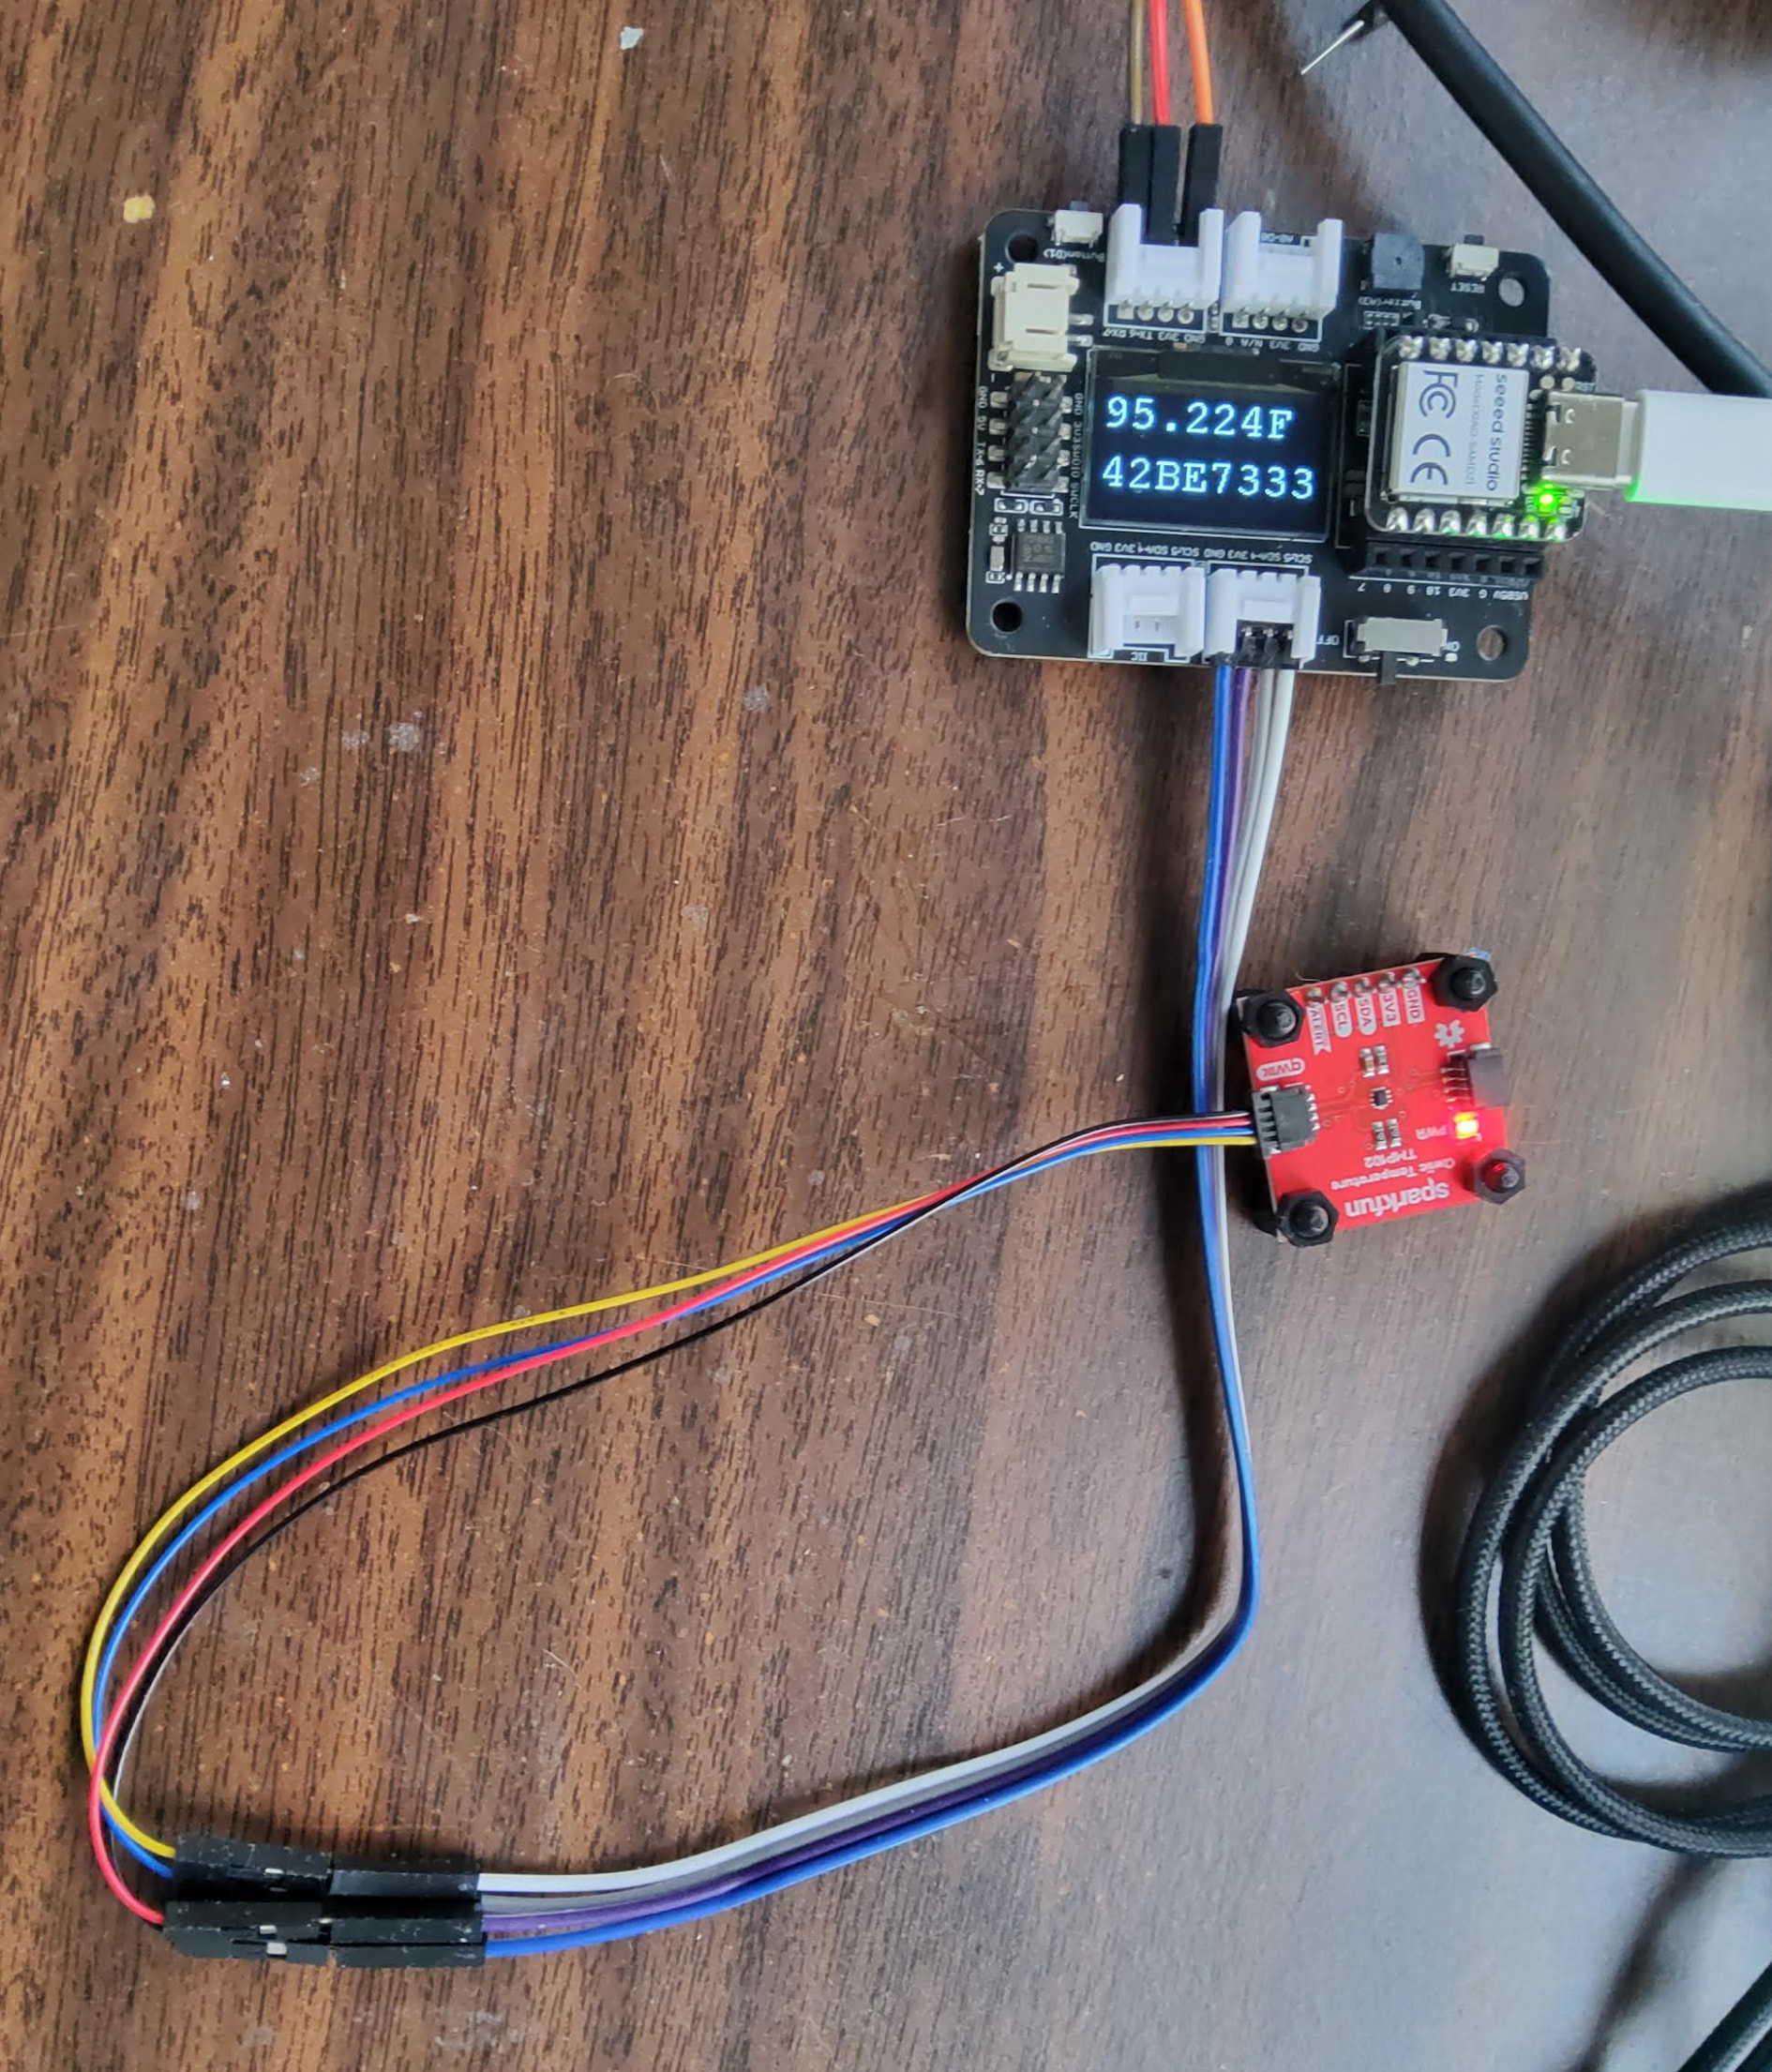
sorry after I give up trying on UNO Q I delete the code, I have try Seeed XIAO board, easily get it work with same sample code. connection as picture

************************************************************

#include <Arduino.h>

#include <U8x8lib.h>

#include <Wire.h> // Used to establied serial communication on the I2C bus

#include <SparkFunTMP102.h> // Used to send and recieve specific information from our sensor

#include <PCF8563.h>

PCF8563 pcf;

union FloatBytes {

float f;

uint32_t as_int; // A 32-bit unsigned integer to match the float size

byte b[4]; // An array of 4 bytes (char or byte works)

};

TMP102 sensor0;

U8X8_SSD1306_128X64_NONAME_HW_I2C u8x8(/* clock=*/ SCL, /* data=*/ SDA, /* reset=*/ U8X8_PIN_NONE);

void setup(void) {

Serial.begin(115200);

Serial1.begin(115200);

Wire.begin(); //Join I2C Bus

u8x8.begin();

u8x8.setFlipMode(1);

pcf.init();//initialize the clock

pcf.stopClock();//stop the clock

pcf.setYear(26);//set year

pcf.setMonth(1);//set month

pcf.setDay(20);//set dat

pcf.setHour(15);//set hour

pcf.setMinut(48);//set minut

pcf.setSecond(0);//set second

pcf.startClock();//start the clock

if(!sensor0.begin(0x48,Wire))

{

Serial.println(“Cannot connect to TMP102.”);

Serial.println(“Is the board connected? Is the device ID correct?”);

while(1);

}

Serial.println(“Connected to TMP102!”);

delay(100);

}

void loop(void)

{

FloatBytes data;

float temperature;

Time nowTime = pcf.getTime();//get current time

// Turn sensor on to start temperature measurement.

// Current consumtion typically ~10uA.

sensor0.wakeup();

// read temperature data

temperature = sensor0.readTempF();

//temperature = sensor0.readTempC();

// Place sensor in sleep mode to save power.

// Current consumtion typically <0.5uA.

sensor0.sleep();

Serial1.print(nowTime.day);

Serial1.print(“/”);

Serial1.print(nowTime.month);

Serial1.print(“/”);

Serial1.print(“20”);

Serial1.print(nowTime.year);

Serial1.print(nowTime.hour);

Serial1.print(“:”);

Serial1.print(nowTime.minute);

Serial1.print(“:”);

Serial1.println(nowTime.second);

Serial.print(temperature);

Serial.println(“F”);

data.f=temperature;

// Serial.println(data.f, 4);

Serial.println(data.as_int, HEX);

u8x8.setFont( u8x8_font_courR18_2x3_r );

u8x8.setCursor(0,8);

u8x8.print(temperature);

Serial1.print(temperature);

Serial1.println(“F”);

u8x8.setFont(u8x8_font_courR18_2x3_r );

u8x8.setCursor(12, 8);

u8x8.print(“F”);

u8x8.setFont(u8x8_font_courR18_2x3_r );

u8x8.setCursor(0, 12);

u8x8.print(data.as_int,HEX);

Serial1.println(data.as_int,HEX);

delay(60000); // Wait 1000ms